A step-by-step guide to DIY Shower Glass Installation
Did you ever find the inconvenience of a shower curtain? Most people do too! This is why most homeowners make the shift from shower curtains to shower glasses. Read more to know why you should transition to a glass shower door and find out how to do a shower glass installation by yourself. Yes, it can be your next DIY project too!
Why shower glass doors?
Shower curtains do provide privacy, and there’s no doubt that they look pretty because of the unlimited design prints available. However, the big downside of having shower curtains is they’re always wet and will keep dripping on the floor, resulting in a messy and slippery bathroom.
Glass doesn’t absorb water, so it won’t make a mess in your bathroom compared to shower curtains.
Here are more benefits of glass shower doors:
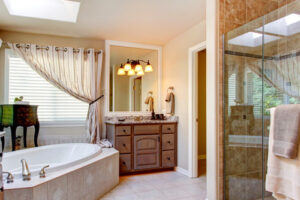
The glass makes the bathroom look bigger.
The natural reflective capability of glass helps brighten your bathroom by reflecting all lights inside. Plus, they create an optical illusion that makes your bathroom area look more spacious.
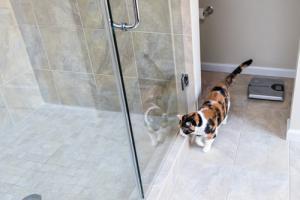
Easy to Clean
With glass, you won’t have to remove it from time to time just to clean it. Instead, just wipe after every shower to reduce or prevent mold.
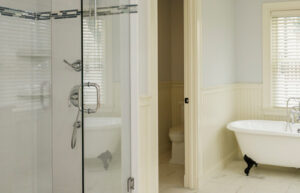
The glass shower door looks elegant.
A glass shower panel gives you that luxurious feel. Separating the shower area from the rest of the bathroom with glass gives that elegant feel, even if the space is small.
Textured glass panels are decorative glass sheets that have been treated with various techniques to create a pattern or texture on the surface. These panels can be used in a wide range of applications, including interior and exterior doors, windows, partitions, and decorative accents.
Related post: The Best Textured Glass Panels
Shower Glass Door Pre-purchase Tips for a DIY Project
- When adding items to your interior design, always measure the space where the item will be. For example, measure first the glass enclosure before purchasing, not the other way around. If you’re planning to do a DIY glass shower door installation, it won’t hurt to seek the help of professionals when measuring your bathroom space so you can seamlessly carry out your project.
- Do you want your shower area to be more private? You can purchase glass that’s either frosted or textured with a pattern. If you want to maximize that optical illusion of glass to make your space look bigger, then the clear glass is the way to go. Clear glass can also help reflect the natural light if there’s a window in your bathroom.
- Most modern glass shower panels are built with tempered glass so that when they break, they break without any sharp edges in the broken pieces. So, Finish-wise, go for a tempered on your shower glass panel installation.
Tools needed for shower glass installation
The good thing about this DIY project is that most of the tools you will be using are items you commonly see in your house. So make sure to check if you have all the things you need before buying anything to cut the cost.
The following are the recommended tools for a DIY shower glass installation:
- Hammer
- Power drill
- Plastic anchors
- Stainless steel screws and a screwdriver
- Wood shims
- Silicone sealant
- Glazing tape
Relate post: Sliding Screen Door Replacement Guide For Homeowners
How to install glass shower door
- Drill holes in the wall where the side rails will be. Put a bead-sized silicone underneath the threshold and place it down until the side rails are in the right spot. Place a plastic anchor inside the pre-drilled holes, and secure the side rails with a screw.
- Place the rubber spacers within the channel on the side of the threshold where the door’s stationary panel will be. Rubber spacers can enclose the water inside the glass door while allowing it to be easily opened and closed.
- Next, carefully slide the stationary glass panel in the threshold, and then attach the top rail and the center rail to the side panel.
- Using a wooden shim, apply a strip of glazing tape in the channel of both sides of the pane. A glazing strip can help prevent water leaks in your enclosure. Make sure to use a wooden shim and not metal.
- Put the swing door in place first and attach its hinges to the bottom rail and the threshold. Then, simply snap the hinges into place, and you’re good to go!
A shower enclosure kits is a pre-packaged set of components that are designed to be assembled to create a complete shower enclosure. These kits typically include a shower pan or base, walls, and a door or curtain to enclose the shower area. The components may be made of various materials, such as acrylic, fiberglass, or tempered glass, and come in a range of sizes and shapes to fit different bathroom layouts. Shower enclosure kits can be purchased with or without additional features, such as built-in shelving or seats. They are often used as a convenient solution for bathroom renovations or for new construction projects where a custom shower enclosure may be too expensive or time-consuming to build from scratch. Installation of a shower enclosure kit can typically be done by a skilled DIY homeowner or by a professional installer.
Conclusion
A shower glass installation is a fun DIY project to do. Just remember to measure your bathroom space carefully. Making an error in the measurement can cost you more money and time when replacing it. So be sure that you have all the boxes checked before doing this fun project.
Get all of your glass furnishing needs from One Day Glass! One Day Glass is a division of the Peninsula Glass company, with industry professionals that deliver creative glass solutions from shower doors to glass shelving and more.
Are you transitioning from shower curtains? Get a customized shower glass panel that fits your style and space preference in just under one day, as our name suggests.
Contact One Day Glass today!