Install Tempered Glass Wall Shelving In Your Home
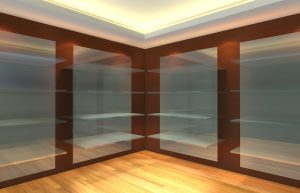
Tempered glass shelves are elegant and suit practically any interior design style. They’re also incredibly easy to install on your own. Here’s how:
For floating tempered glass shelves, all you need are several tempered glass shelves, a drill, a screwdriver, a wall saw, adhesive caulking, measuring tape, a pencil, and a mounting template.
Step 1: Choose the type of shelves and placement
Decide on what type of tempered glass you want for your shelves. There are different designs to choose from, but for this project, clear tempered glass is probably the best option. Make sure your shelves are thick enough to hold sizeable loads.
Now think about how you want your shelves to look on the wall. Some people want the floating shelves to be arranged uniformly while some prefer alternating rows. Make sure there’s enough space between shelves for tall items.
Step 2: Mark the positions
Use the mounting template and measuring tape to mark out where you need to cut the grooves into the wall. Double check the measurements to ensure that the floating shelves don’t end up lopsided. Try looking at the markings from across the room to make sure they’re perfectly aligned.
Step 3: Cut the grooves
With the wall saw and the markings as a guide, cut the grooves into the wall. Before you do this, make sure there are no electrical wires behind the spot you are cutting into. In some cases, your tempered glass wall shelves may need brackets to hold them up. Use a drill to make holes in the wall for the brackets.
Step 4: Secure the shelves
Apply adhesive caulking on the back edges of the tempered glass shelves and then slip them into the grooves. Make sure the caulking has dried completely before you place anything on the shelves.